I’ve Developed My InfoPath Form, Now What?
So you’ve worked diligently to develop a nice looking for that transforms your old paper form into an automated, efficient electronic form which will save your company many hours in data collection and improve accuracy of the data collected. However, you are now stuck as to how to proceed with your form to deploy your form with Formotus.
The answer is relatively simple. and involves the following steps.
- Upload form to Formotus
- Deploy form to a mobile user
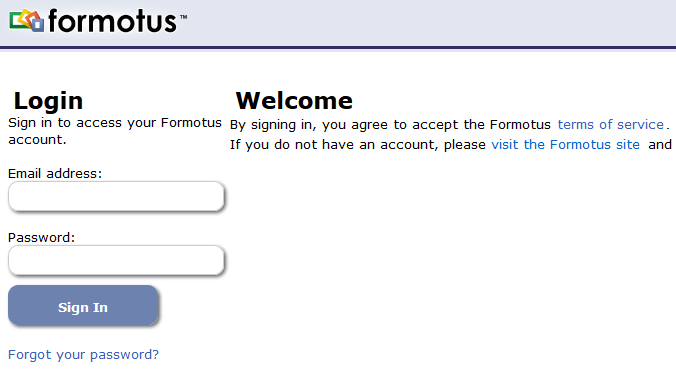
To upload your form to Formotus, begin by opening your browser and visiting https://secure.formotus.com.
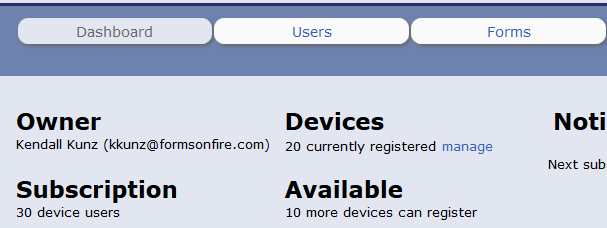
Once you are logged in, you will see the Formotus dashboard.
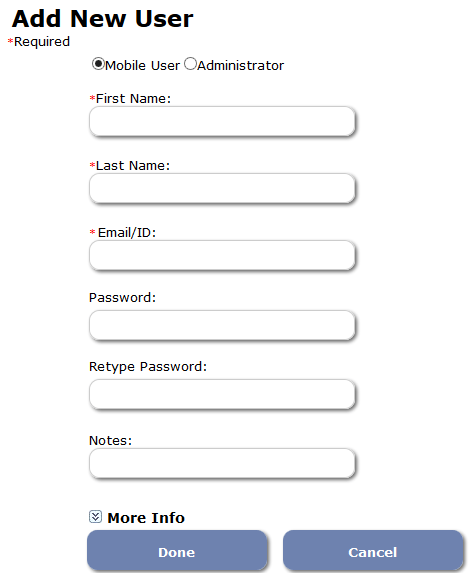
This post assumes that you have already created a user to which the form will be deployed. If not, just just click the “Users” button. This will take you to the user management screen. From there click “New User”.

Enter the required information and click “Done”. To create a new user, you will need to enter a first name, last name and email/ID. All other fields are optional. Once you click “Done”, the user will be available in the console to deploy forms to.
Now that your user account is ready, proceed to the “Forms” management screen. Click the “New Form” button to begin.

This will bring you to the Formotus Form Factory. You will be given the choice to add a form from the “Built In” Formotus forms (previously named “Standard Forms”), uploading a form from your Local Drive, or uploading a form published to SharePoint.

Because you have developed your own form, we will focus on the “Local Drive” and “SharePoint” options. From this point, on the process is fairly similar for both options.
When uploading a form from your local drive, you will need to enter.
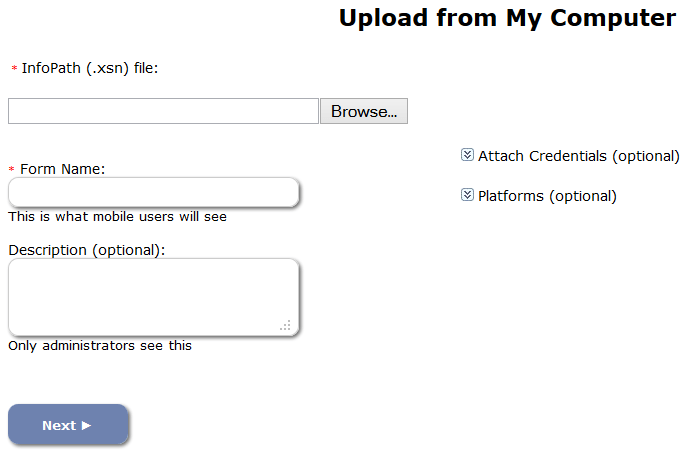
Click “Browse” to find the XSN form template on your drive. Then enter a “Form Name” and click “Next”.
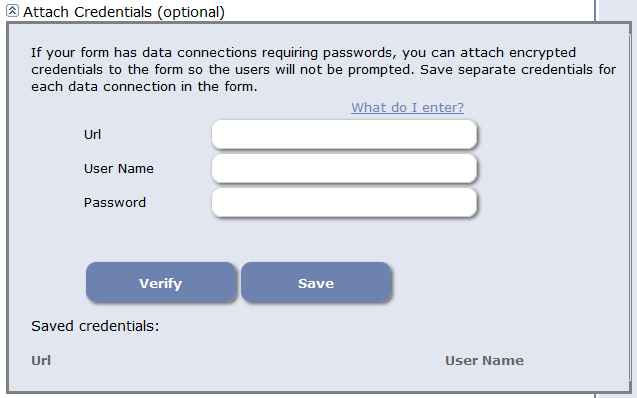
Note: If your form has data connections to SharePoint (either to submit to a form library or to pull data from a list) you will need to specify credentials.
For data connections to receive information within the form, you will need to enter a user name and password, as well as the URL of the site collection where the list or library is located. Example: https://sharepoint.mycompany.com.
For data connections to submit information (this includes saving the form instance XML file to a library), you will need to enter a user name and password, as well as the URL to the form library where the list or library is located. Example: https://sharepoint.mycompany.com/library.
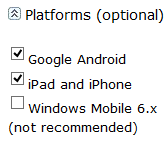
You will also have the option to select whether you want to convert the form for the following platforms. By default, Google Android and iOS are selected, but you can choose to convert exclusively for one platform or another, or add Windows Mobile.
- Google Android
- iPad and iPhone
- Windows Mobile 6.x
If your form is a “dispatch” form, you will need to check the box for “Workflow Form”.

Now click “Next”. The form will be uploaded to Formotus and converted for the mobile platform(s) selected.
Once the form converts, you will have the option to select the default views for Tablet, Phone or Email. This is an optional step.
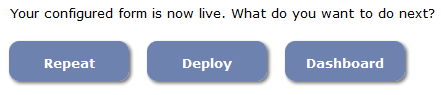
Now, click the Finish button.

Lastly, you need to deploy the form to your user. Click the “Deploy” button from the success screen.
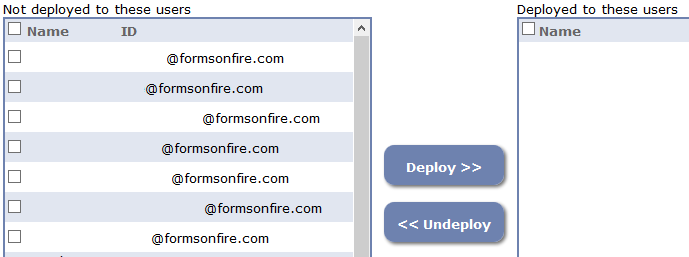
You will see a list of users and groups which are available to deploy forms to on your account. Check the box for the user(s) for which you want to deploy the form and click “Deploy”. If you make a mistake, simply check the box on the right and remove users by clicking “Undeploy”.
That’s it! For more tips and tutorials on InfoPath, Formotus and other mobile form development topics, follow our blog at http://www.formsonfire.com/blog. If you have questions or would like assistance for your mobile project, contacts us at engage@formsonfire.com.