How To Create Data-Driven Applications with Forms On Fire

Kendall Kunz

Create Powerful Data-Driven Applications with Forms On Fire

From the beginning, Forms On Fire's no-code design tools give you the ability to create powerful database-like applicatrions. These data-driven applications get you beyond forms and beyond simple flat-files of information allowing you to design fully relational database-like applications. The example shown in this article is available with any account, including free trials, from our templates catalog. We recommend that you install the "Company/Contact Database App" to follow along. 


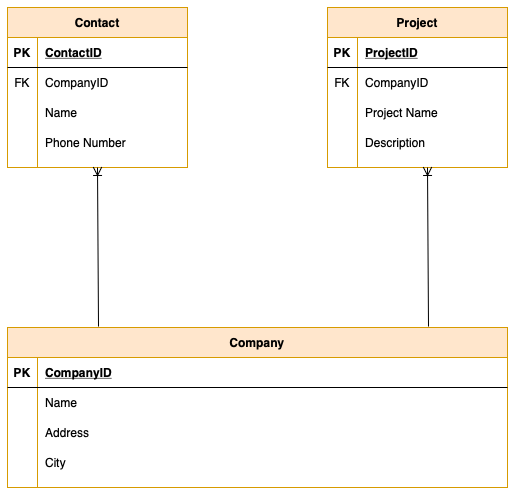
From a modeling standpoint, we observe three different and distinct entitites, showing the relationships between them. Each Company may be the employer of many contacts. Each Company may initiate and manage many projects. Each contact must belong to one and only one Company. Each Project must managed by one and only one Company.


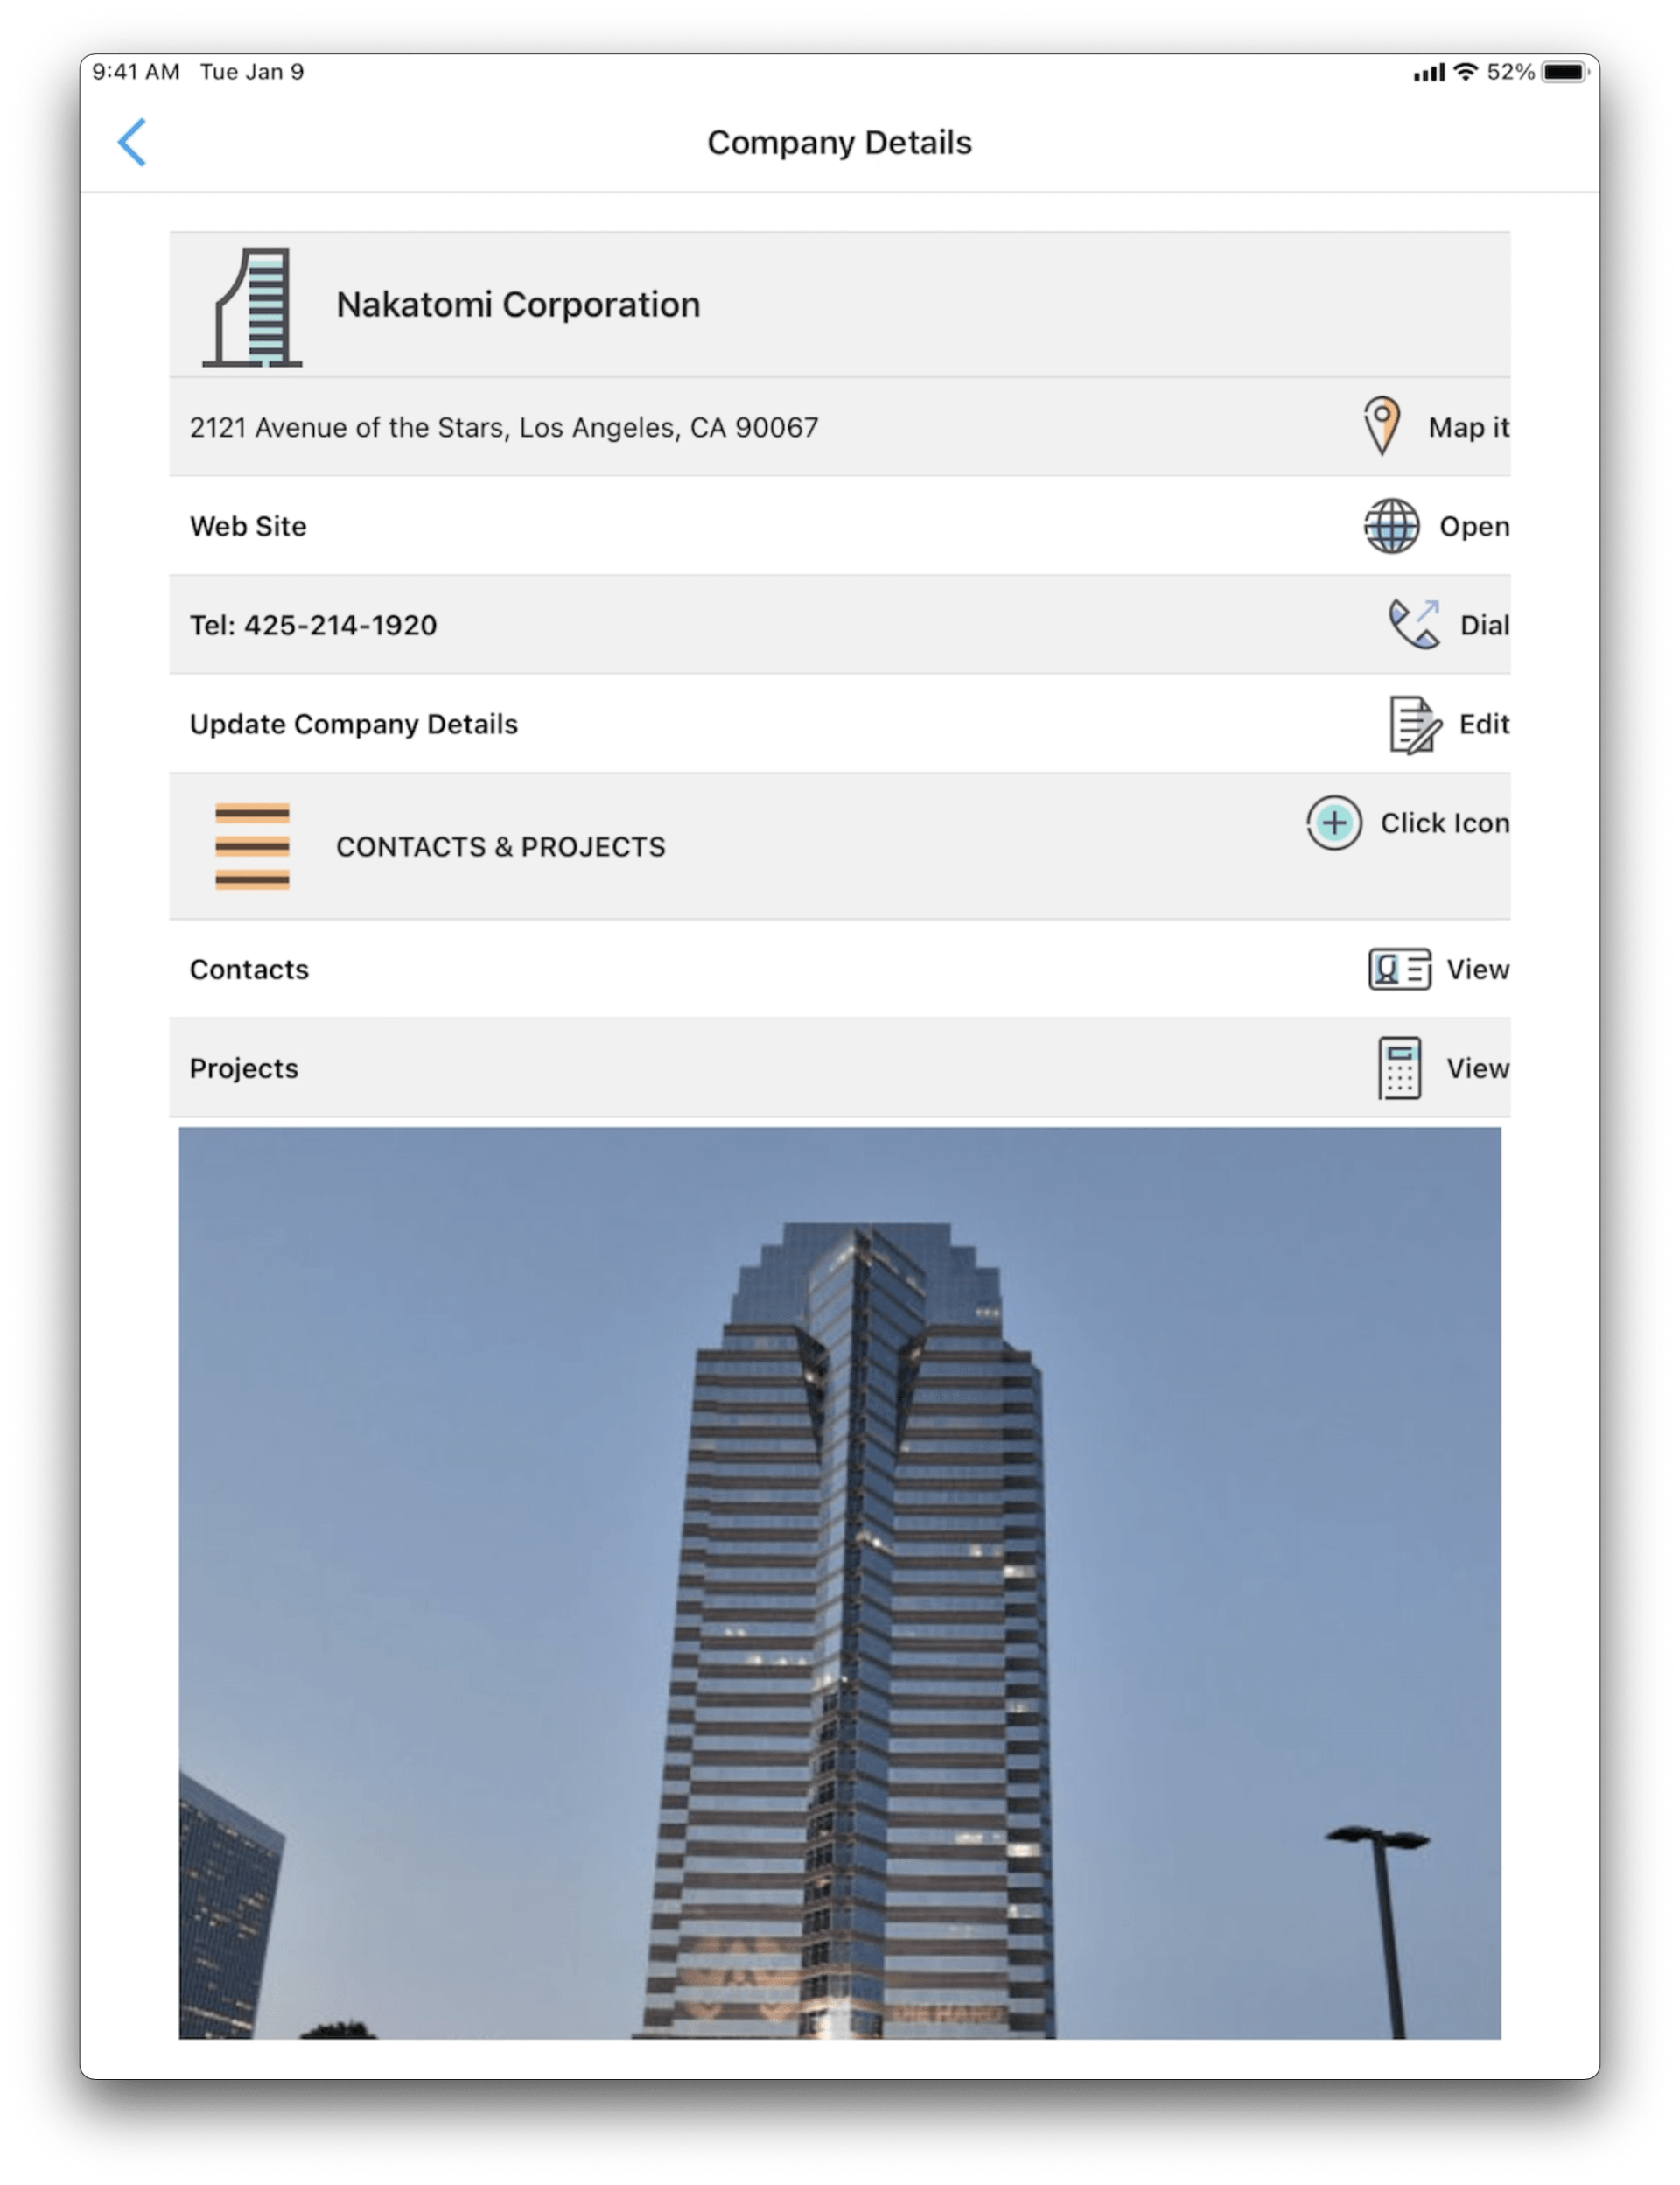
An Entity becomes a Data Source in Forms On Fire. If you have been designing relational database applications, a Data Source is equivelent to a table. Notice in our example, we have identified a Primary Key (PK) for each Entity. Project and Contact require a Foreign Key (FK) column, identifying which Company with which they belong. Each entity also has other information, possibly unique to it, such as company name, address, etc.


Follow these 4 simple steps to create this data-driven application including:

  1. Create a Data Source for each entity, in this example that includes Company, Project, Contact.
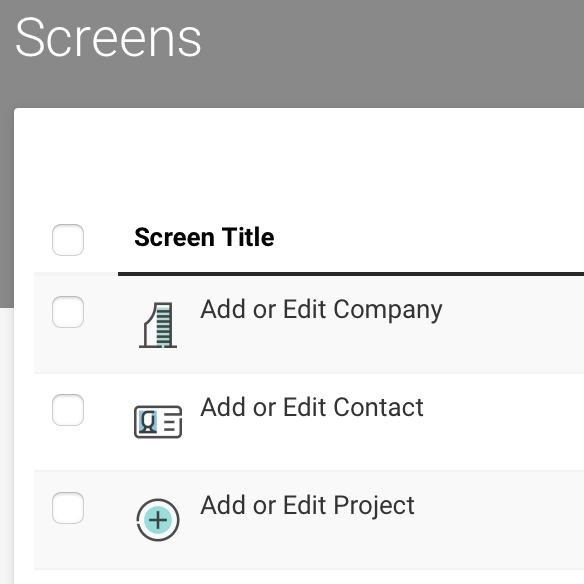
  2. Create a Data Entry Form for each entity.
  3. Create a Details Screen for each entity. 
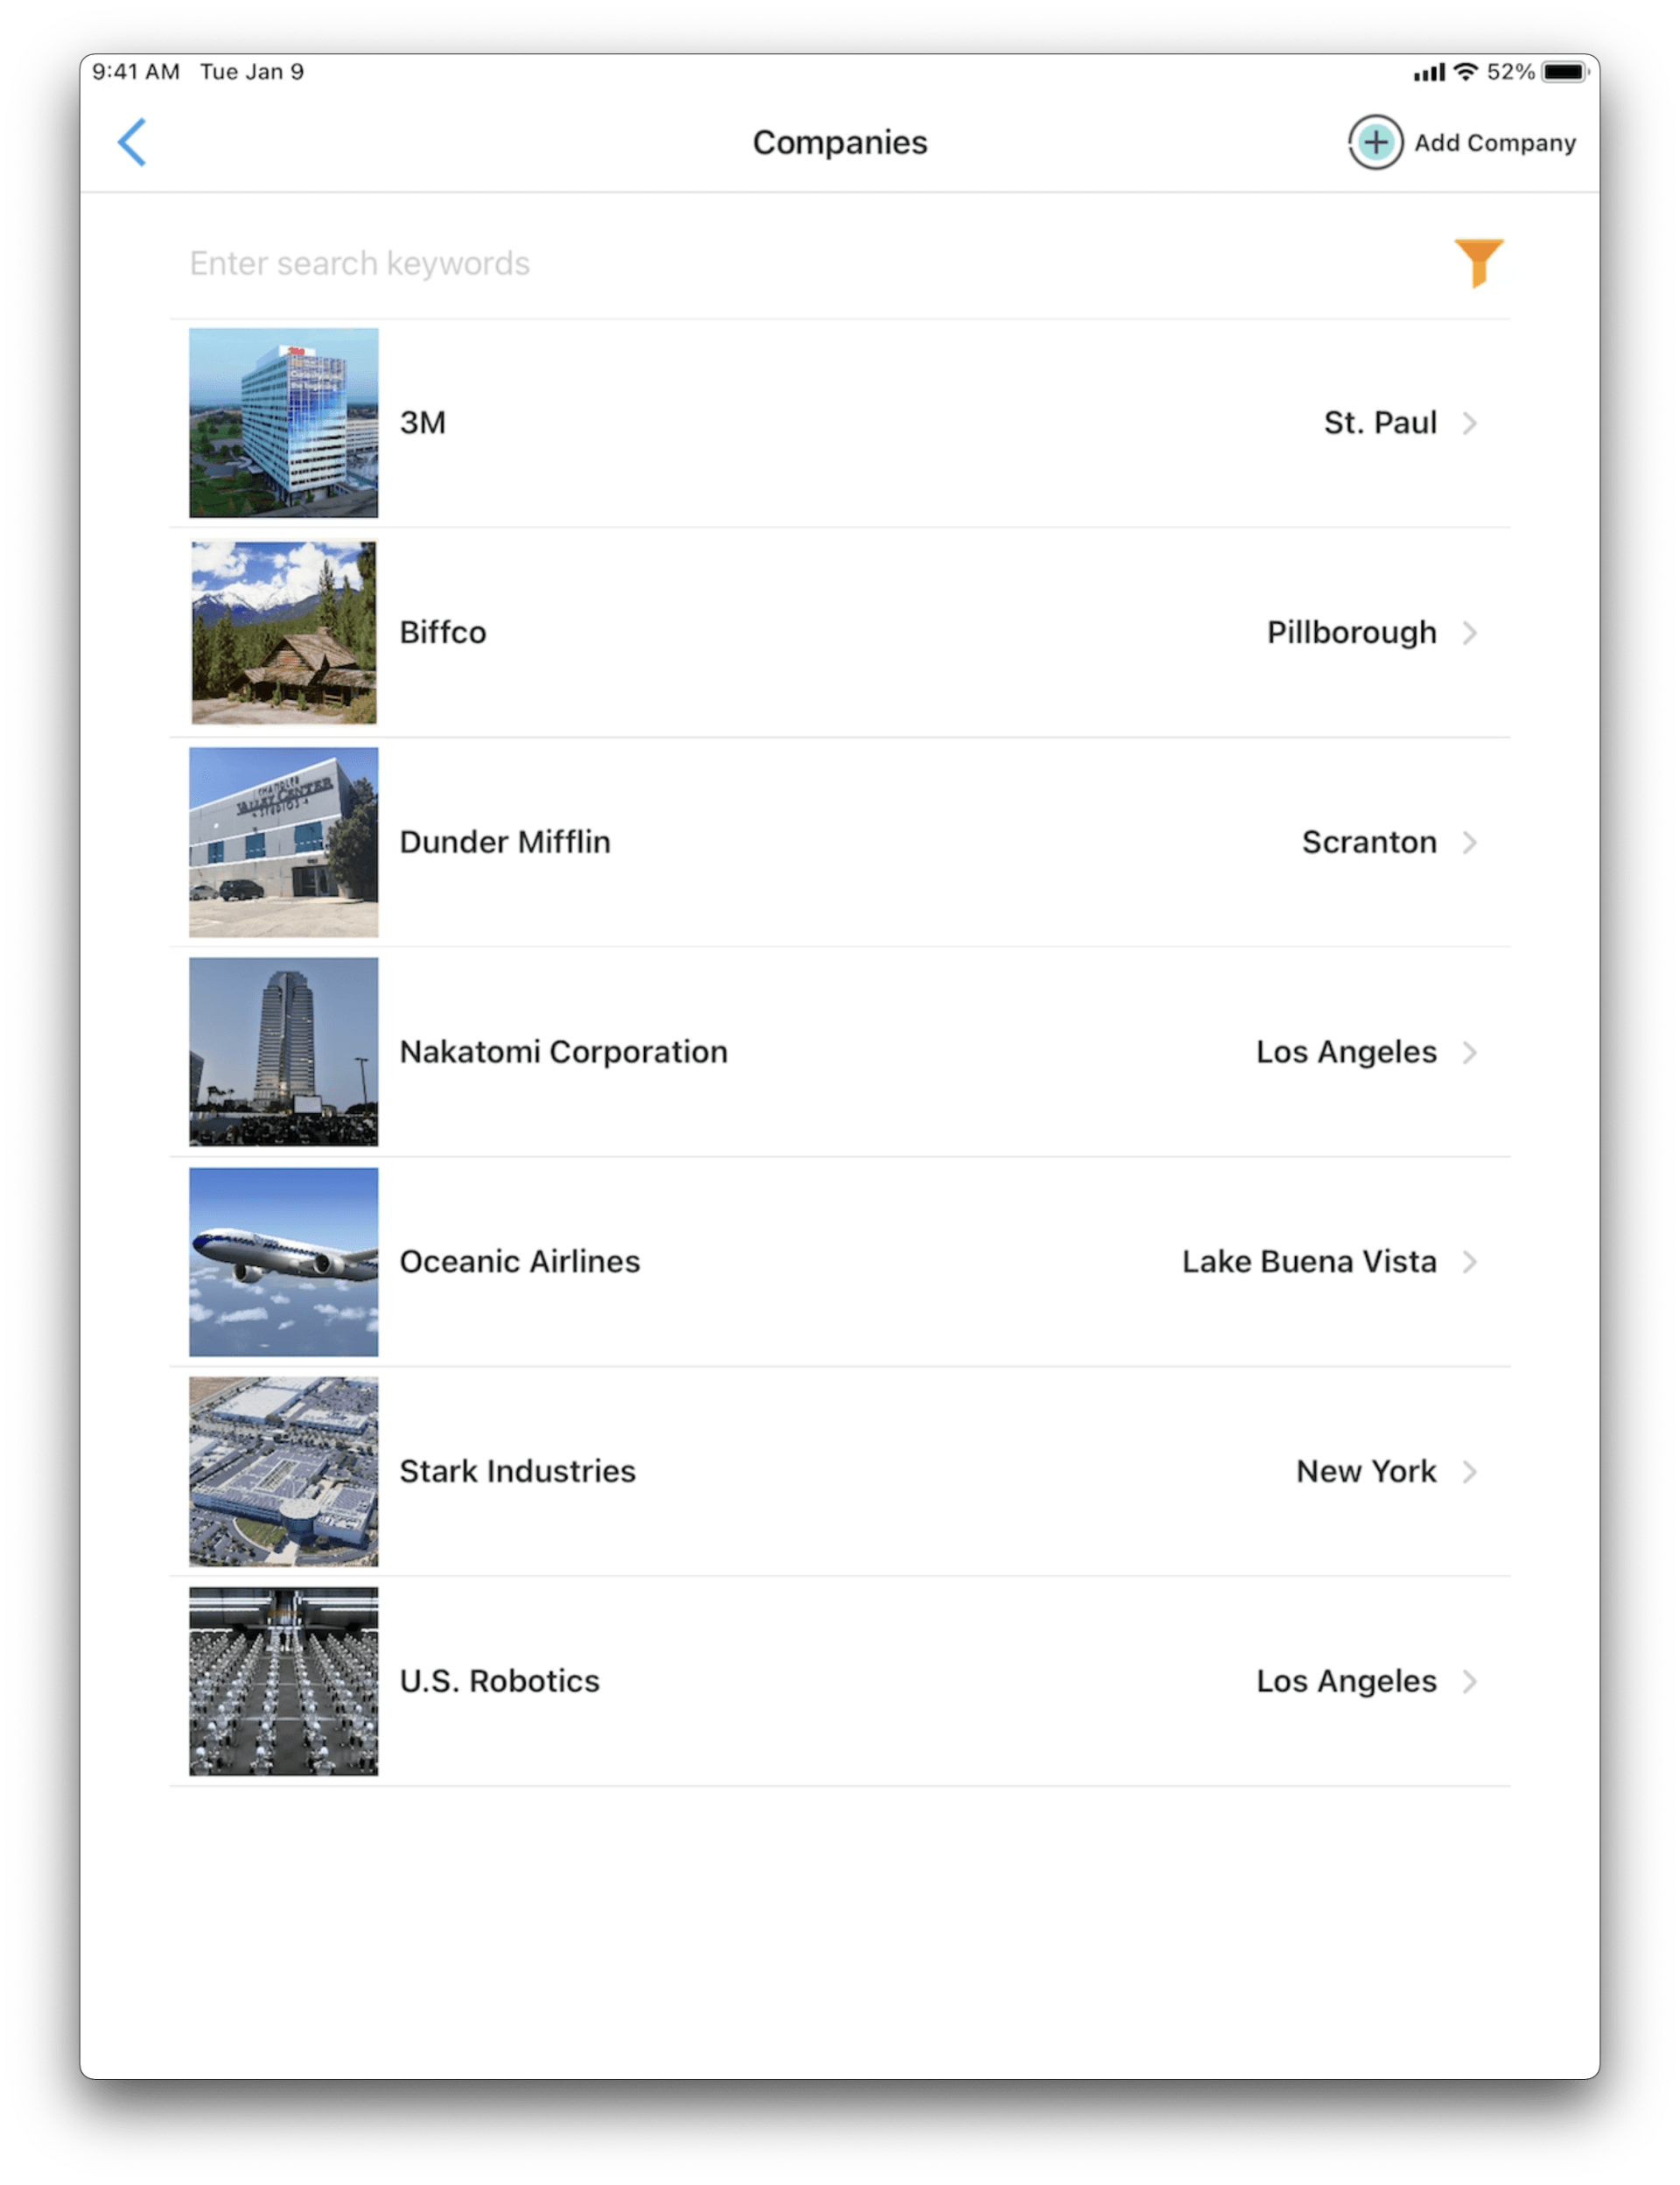
  4. Create a List of Data  for each entity.

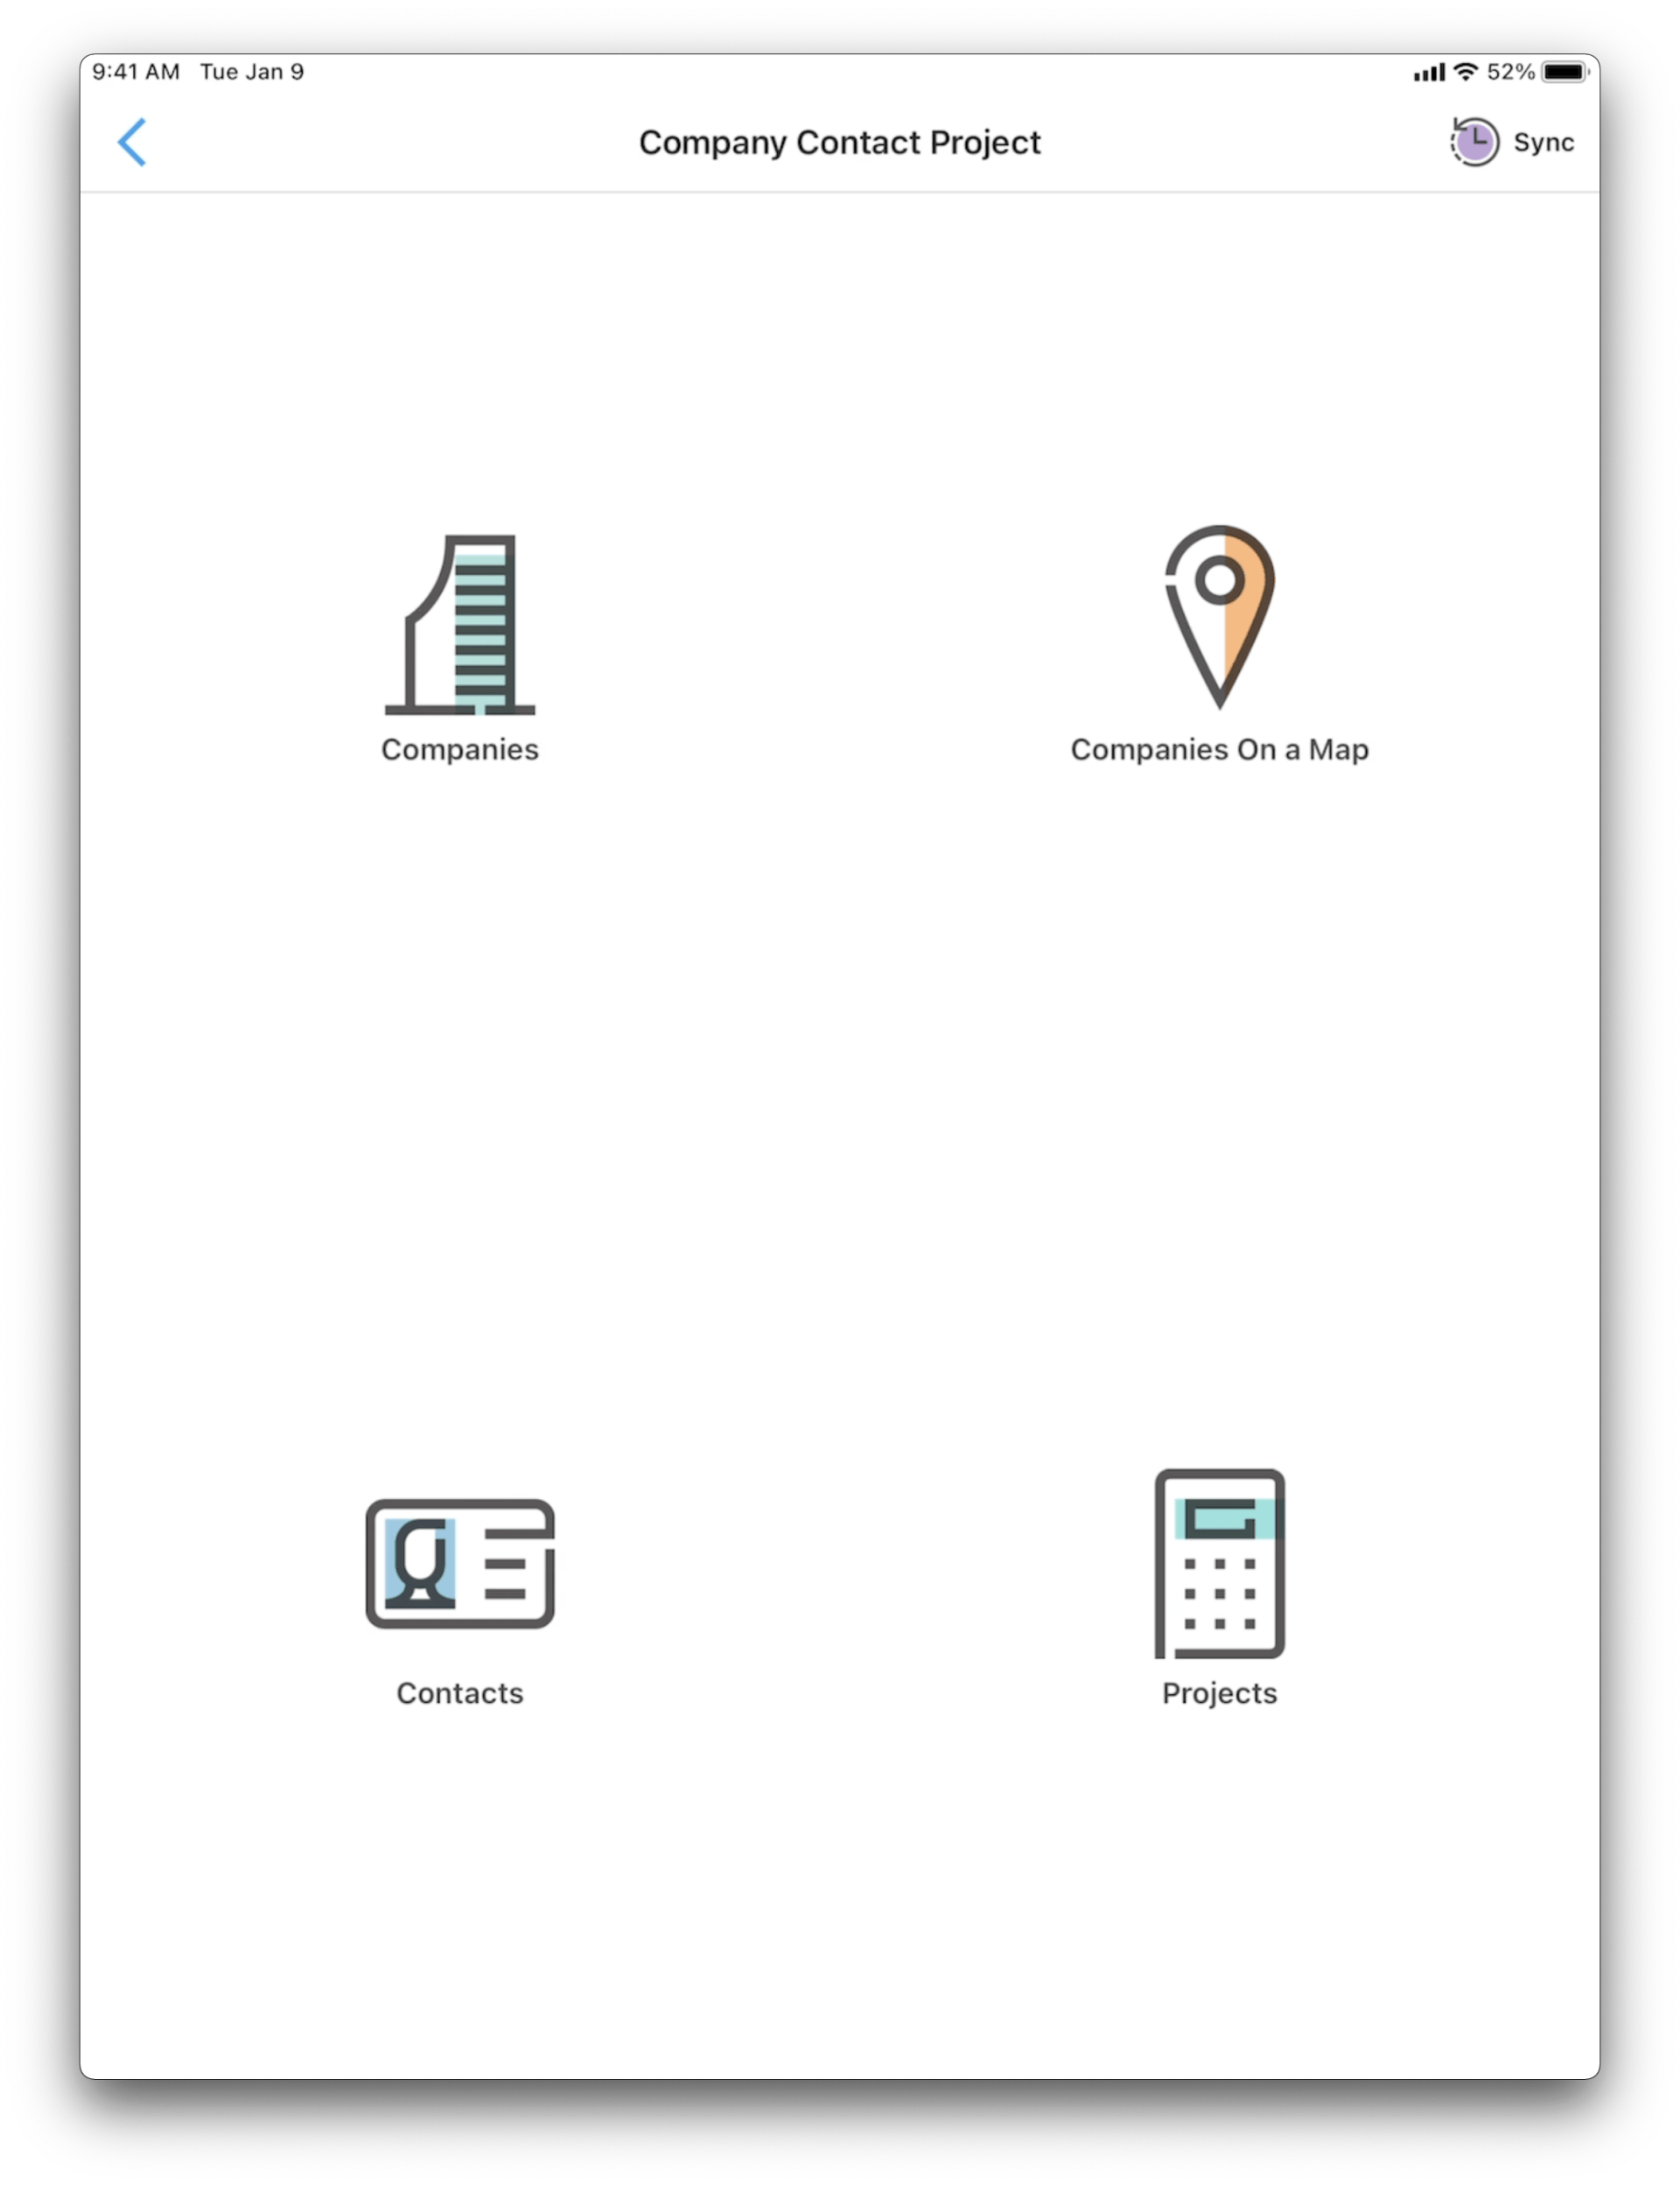
Optionally if an entity contains location (GPS) information, create a mapping screen for that entity. 

Step 1: Create Data Sources

Your first step is to create your data source. You can find instructions for designing data sources here. Keep in mind that column 0, your first column, must always contain a unique value. For each of the three entities in our example, our company name is thought to be unique and therefore will take on the primary key (PK) for the Companies data source.


Notice that the Contacts data source allows a system generated primary key (PK). This is also called a GUID, or Generated Unique Identifier. Company Name is identified in column 5 of our Contacts data source, completing our use of the foreign key (FK). This field becomes required in each of our screens.


Data Sources are more easily created by uploading an excel spreadsheet containing at least some data in each row and column. This allows you to more easily test what you are creating along the way.

Step 2: Create Data Entry Forms for each entity.

Creating a Data Entry Form is the most common of all the form screens. Detailed instructions from the knowledge base can be found here


One Data Entry Form will be created for each of Company, Contact, and Project. Notice that a single screen is used to both add and edit records in our three data sources.


To shorten the time required to design each Data Entry Form, simply select the data source associated with your Data Entry Form. This will create a text field for each of your columns in the data source created in step 1 above. 


Many of those columns may not be purely text fields. The fields that are created automatically are great placeholders for each of the fields you may want in your Data Entry Form. Simply replace them with the appropriate field type, such as a choices field, a number field, a date field, etc. 


For each of the Contact and Project Data Sources, be sure to create a choices field for the foreign key (FK) that identifies the related Company. 


Pro Tip: For each field, be sure to click (highlight) the field, and adjust each field's settings, such as whether it is required, value ranges, visibility rules, and so on. 


Pro Tip: Be sure to put your form in test mode, testing it on your device frequently, and when you are satisfied with your results, publish the Data Entry Form.

Step 3: Create Detail Screens for each entity

A Details Screen shows one and only one record of a single Data Source. This next step requires simply pressing Add New under the menu item Design Tools > Forms Screens. Detailed instructions for designing a Details Screen can be found here.


For now, please Publish this screen and move to the next step. Details Screens are very powerful, allowing you to use all kinds of action buttons. You will likely want to return to this screen design to make modifications in the future. 


Pro Tips: For the Company Details screen, check out the various action buttons which allow you to:

  • Show a Company's location on a mapping screen
  • Open a web site from the detail screen
  • Dial a telephone number
  • Open a Listing Screen containing related Contacts for a Company
  • Open a Listing Screen containing related Projects for a Company
  • Updating or editing a specific Company's information
  • Details Screens can also display image fields. Be sure to define those images in your data source as images.

Step 4: Create Listing Screens for each entity

List of Data screen types show all records of a single Data Source. Be sure to read instructions on designing this screen from our knowledge base.


A List of Data screen allows you to display up to 4 columns of data from your Data Source. You may add a 5th piece of data if you display an icon image. Be sure the column in your Data Source is defined as an image or icon to display.


You may also define a default filter for this List of Data. 


Pro Tip: A single interaction for clicking on a row can be defined such as dialing a phone number, opening a map, or displaying a web site address. In addition, you can open other screens from this listing screen, such as opening your Data Entry Form, or Details Screen. Notice in our Companies List of Data screen, we have pre-defined opening the Company Details Screen by passing the parameter {{this[0]}}, which filters the detail screen using the same primary key of the item we click on in the List of Data Screen. In this lies the power of data-driven designs within Forms On Fire.


Pro Tip: Notice the "Add Company" in the right hand corner of the List of Data screen. This gives your users the ability to add a user without assistance. 

Optional: Create Mapping Screen for entities containing GPS locations

Data Sources that contain a column defined as Location or GPS information can be displayed on a Mapping Screen. Check out the "Companies on a Map" screen to see how it works. Notice the interaction between a specific map location icon and opening a Details Screen. This interaction works in the same way as a List of Data Screen opening a Details Screen.

Summary

Creating data-driven applications with relational database-type constructs can eliminate a great deal of paperwork and massively increase efficiencies in the field. 


Data Sources are available to your users offline and online. Integrating your various screen types give you even more efficiencies. 


Using our no-code design tools, you can design these yourself, or your can hire our consulting group to design them for you. Chat with us, email us, or call us. We'd love to hear your use case and help you achieve your line-of-business mobile application goals, exclusively for your employees and contractors. 


Write no code. Blow minds.

Share by: